 Cleaned, Sanded, Wiped Down, & Starting to Prime
Lately I've had several questions about spray painting furniture. I did a little tutorial a while back, but I thought I'd go more in depth here.
**If you're a painting pro,
you can skip all of this and scroll down
to the photo of the finished project**
The
prep work is VERY important to a good paint job. If the piece already has a paint or stain finish you will need to give it a good cleaning. A solution with a degreaser works best, but you can use a good dish soap too. This will take off any build up of stuff like food, hand prints, everyday grime, etc. Be careful not to soak the wood! If the piece needs to have any repairs like gluing or filling in holes or cracks, this is the time to do it.
Next you need to
sand the piece. I prefer using a medium grit. You don't need to sand the project until it's bare. You only need to make the existing surface a little rough so that the paint will adhere. Sanding the original finish makes the new paint able to bond to the old. You can use a liquid sander if there's a lot of detail to your pieces. When I use the liquid, I will often go over the piece again with a light sanding in the areas where it will get the most wear.

Be sure to
wipe everything down with a tack cloth or a dry, clean rag to get off ALL of the dust. If your project has areas that don't need to be painted (like the insides of drawers) you should mask off those areas with newspaper and painter's tape.
If I'm sure that the original finish was a latex or spray paint, I don't use a primer. However, if I've sanded off the finish, or if the finish was a factory finish, then it's important to prime your project. Primer helps the paint adhere well. It also helps avoid any strange reactions that can occur when different paint chemicals mix. Use a quality high adhesive primer, unless you want to distress your piece after it's painted---sanding it to make it look worn. If you prime then sand, you'll uncover the primer instead of the wood and it may not be the look you're after. But if you choose not to prime, then the paint may continue get distressed/chipped with use.
 Use light colored primer for light paint colors
and dark primer for dark paint colors.Now it's time to paint. Shake the can well. Hold the can about ten inches from your project and
spray in a steady back and forth motion, slightly overlapping each stroke. I like to think of my hand as an automated arm,
holding the spray the same distance across the piece. I also start spraying about an inch to the side of the piece and stop an inch after it. I DO NOT push on the spray continually. You get a much more even spray if you
start and stop with each stroke, keeping the can in motion as you spray. Shake the can occasionally between spray strokes.
It's important to
spray a LIGHT coat of paint! Don't try to saturate the piece with paint on the first coat because the paint will run. If this occurs, wait for the paint to dry and then lightly sand the run marks. Give the piece a light sanding between each coat to remove imperfections, then wipe off the dust. I give each piece at least two coats of paint, and usually several coats on the areas that will receive the most wear.
 I like to use these name brand paints.
They cover well, are durable and they come in a satin finish.
: Do Not be tempted to use every ounce left in the can on your final coat. I have found that the very bottom of the paint can does not go on as smoothly. It may spritz out or look a little powdery. When dry, the finish can appear blotchy, shiny in some spots and dull in others. You can always finish off the can by using it as a first coat on another project. The last coat should be the smoothest. Sometimes I will use a new can for the final coat---which explains why I buy so many cans of paint. And if you're wondering, I usually use at least two cans on a project but, I've used as many as five cans depending on the original finish and the size of the project. Using several cans is costly, but spray paint is convenient, quick, and it cures faster and to a harder finish than brushing on paint.
Spray paint doesn't add a lot of thickness or moisture to the wood the way brush on paint does, so you don't have to worry about swelling joints or sticking drawers. It's also easy to touch up. If chips occur, just give it a quick, even stroke of spray paint to cover the damage.
I prefer a satin finish on all of my projects. I like the warmth of the sheen better than a flat finish and satin is a little more forgiving than a gloss finish. If you want extra protection for your project, you can spray on a polyurethane or use a wax made for painted surfaces. Both products can be found in the paint aisle.
 Finished and waiting for the bedroom to be painted
 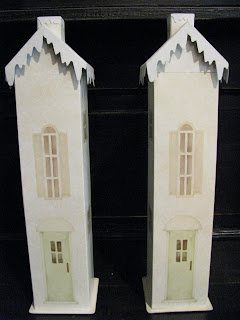 These sparkly cone trees are from the dollar store.
 Put them all together and what do you have?
 A simple little Christmas village
 These sparkly cone trees are from the dollar store.
 Put them all together and what do you have?
 A simple little Christmas village


